Everything you always wanted to know but were afraid to ask
PEX tubing and fittings are starting to push copper out of home-handyman (and plumbers') toolboxes. Learn tips for working with it and what all the specialized tools and fittings are for in this article.
Overview

I’m not a plumber. But like any remodeler, I occasionally find myself relocating a hose bib or fixing a pipe that managed to get in the way of my Sawzall. For years, my plumbing kit was a torch and a bucket of copper fittings. These days, that bucket mostly holds PEX fittings and tools. And my soldering torch doesn’t get used much anymore.
Switching to PEX wasn’t difficult; PEX is a whole lot easier to master than copper. The only tricky part was deciding what to carry in my plumbing bucket. Visiting the plumbing aisle at my local home center didn’t help matters—all those strange tools, connection systems and unfamiliar thingamajigs made my head spin. But with lots of advice and a little on-the-job training from plumber friends, I figured out what’s needed and what isn’t. Here’s what I learned about getting set up for PEX.
Choose a common connection system
Before you choose a system for connecting PEX to fittings, check what’s available at the stores where you like to shop. There are a half-dozen systems out there, but most are available only through specialty plumbing suppliers. If you want to shop at home centers and hardware stores, there are two widely available methods to choose from: copper crimp rings and stainless steel cinch rings. I like the cinch system better because the tool is smaller and one tool can handle four ring sizes (3/8 to 1 in.). But cinch rings aren’t as widely available in my area, so I chose the crimp system instead. Crimp rings require a different tool for each size or a combination tool, and the bigger tools are awkward in tight spots. Still, I’d rather put up with the drawbacks of the crimp system than drive across town to get supplies. You can also shop online. Whatever system you choose, keep an eye on prices: I’ve found that the costs vary a lot from one supplier to another.
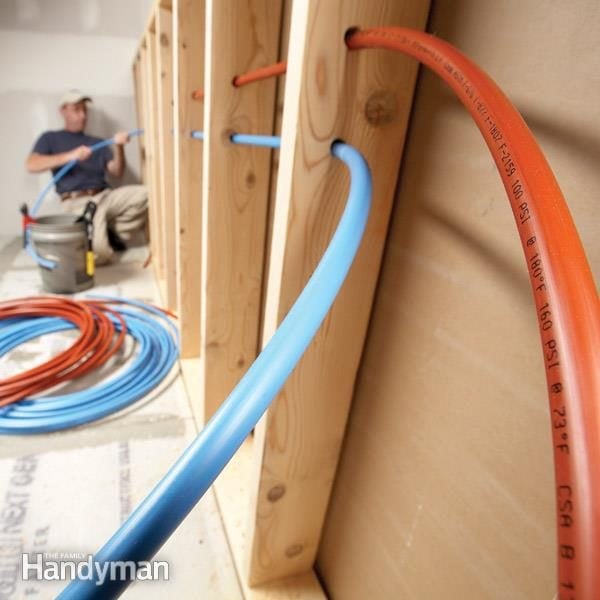
Buy sticks, not coils
PEX has a strong “memory”; it always wants to spring back to its original shape. So working with a coil of PEX is like wrestling with a giant Slinky. For most jobs, you’re better off buying 10-ft. “sticks” instead. You may have to pay a few cents more per foot and install a coupler or two, but you’ll avoid frustration and kinks. Even plumbers who run miles of PEX every year often buy sticks rather than coils.
Stock up on push-ins
Don’t show up on any PEX job without a few push-in elbows, tees and couplings (SharkBite is one brand; www.sharkbite.com). They’re the best solution for cramped quarters where there’s no space for a crimping or cinching tool. No tool is needed; just push in the PEX and walk away. And since they also work with copper and CPVC, you can carry just a few push-in fittings rather than a huge collection of special transition fittings. Convenience doesn’t come cheap, though. You’ll spend from $5 to $12 per fitting. Also, check with your local inspector before you use push-in fittings. Some jurisdictions don’t allow them in inaccessible locations like inside walls.
Bend PEX carefully-or not at all
PEX is easy to kink. With one brand (Uponor Wirsbo), you can restore the tubing by heating it. But with most PEX, you have to cut out the kink and splice in a new section. You can also damage PEX by overbending it. (The minimum bend radius is typically six to eight times the outer diameter, depending on the manufacturer.) One way to avoid kinking and overbending is to use bend sleeves. Keep in mind that—even with a sleeve—a bend requires open working space. In tight situations, save yourself some struggling by using an elbow fitting instead.
Get a crimp cutter
PEX fittings cost about three times as much as copper fittings. So you won’t want to toss your mistakes in the trash. If you use cinch rings, you can saw or twist off the ring tab, pull off the PEX and reuse the fitting. But sawing through a crimp ring—without damaging the fitting—is a job for a surgeon. For the rest of us, a crimp cutter is a lifesaver. Just slice off the PEX flush with the fitting and make two cuts in the ring.
Stub out with copper
You can buy shutoff valves that connect directly to PEX. But don’t. PEX can’t handle abuse the way copper can—picture a homeowner cramming more and more stuff into a vanity or cranking that crusty valve closed years from now. So use copper rather than PEX for wall stub-outs. For risers coming out of the floor (or extending down from the ceiling to a laundry tub faucet), use lengths of copper pipe.
Required Tools for this Project
Have the necessary tools for this DIY project lined up before you start—you’ll save time and frustration.
- Utility knife
Required Materials for this Project
Avoid last-minute shopping trips by having all your materials ready ahead of time. Here’s a list.
- Bend sleeves
- Copper stub-outs
- PEX
- PEX cinch rings or crimp rings
- PEX fittings
- Push-in fittings
Comments
Post a Comment